
From:

One sure way to address for success? Create sleek, wrap-around labels. If calligraphy is too costly or your penmanship isn't perfect, this is a handsome, appropriate option that's easy to do.
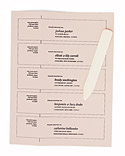
Folded Label How-To
Using our template, type return addresses on left side of document and addresses on right; print. Run page through a sticker machine. With a bone folder, crease where indicated; cut out using a utility knife and ruler. Trim short edges with pinking shears. Adhere labels to envelopes, positioning folds so return addresses are on back.
How to Use This Editable PDF
General Tips
1. You will need Adobe Acrobat Reader software to open this PDF file. You can download it here.
2. You will not be able to save a version of the file that contains your changes. You can, however, save a copy of the template itself, which will let you open and modify it again so you can do your work in several sessions.
3. Because you cannot save a copy of what you've typed, proofread carefully on screen before printing it out.
4. To change the words, highlight the entire line of text, and then retype. You will notice that the type shifts position on your screen when you do this, but don't worry -- it will print out in the proper position.
The Return Address
1. When you change the topmost return address, the software will automatically change all the others on the page.
2. Use all lower case when typing the return address.
3. Spell out the state name.
4. Place a space between each number of the ZIP Code.
The Recipient's Address
1. Use an ampersand for the word "and."
2. Press the "Caps Lock" key when you type the street address, and the city and state.
3. Spell out the state name.
4. Type a space between each number of the ZIP Code.